 Home
Home Recipes
 Beans
Beans Gear
Gear Roasting
 Brewing
 FAQ
FAQ
I’m excited to share this ultimate guide to thermos coffee brewing with you. Many people see their insulated containers just as places to store things. But, they can do so much more, like making fresh drinks on the go.
Learning how to brew coffee in a thermos lets you enjoy a high-quality coffee anywhere. By using your container as an immersion brewer, you can make your morning coffee easily without extra gear.
Success comes from knowing a few important things like water temperature and steep time. By following these steps, your thermos becomes your go-to kitchen tool. I guarantee you’ll never go back to bad instant coffee on your adventures once you try this.
Key Takeaways
- Turn your usual insulated flask into a useful immersion brewer.
- Get the best flavors by keeping the water at the right temperature.
- Grind size is key for a smooth, clean coffee.
- Save space in your bag by ditching big, manual coffee makers.
- Enjoy hot, fresh drinks anywhere, no matter where you are.
Essential Gear for Thermos Brewing
To master thermos brewing, you need the right gear. The right tools are key for a great extraction. Good equipment keeps your coffee hot and tasty for hours.
Selecting the Right Thermos for Coffee
The best thermos for brewing coffee is usually vacuum-insulated stainless steel. These keep temperatures steady, which is crucial for brewing. Look for double-walled ones to avoid heat loss.
When you’re always on the go, durability matters. Your thermos should have a leak-proof lid and a strong body. The right size is also crucial for the perfect water-to-coffee ratio.
Necessary Brewing Accessories
You’ll also need some precise tools for great results. A reliable burr grinder is a must. It grinds coffee evenly, avoiding bitter tastes.
Using a digital scale to measure coffee and water is also a good idea. It helps you make your favorite cup every time. With these tools and the best thermos for brewing coffee, you’re all set for a top-notch brewing experience.
Understanding Coffee-to-Water Ratios
The secret to a great thermos coffee recipe is in the measurements. Finding the right balance between flavor and strength is key. It’s not just luck; it’s about using a consistent ratio that you like.
Calculating Your Ideal Strength
Most coffee lovers start with a 1:16 ratio. This means one gram of coffee for every sixteen grams of water. This ratio gives a well-rounded taste that shows off your beans’ natural flavors without being too strong or weak.
If you want a bolder coffee, try a 1:14 or 1:15 ratio. For a milder taste, add more water to reach a 1:17 or 1:18 ratio. Making small changes can help you find your perfect cup.
Measuring for Single vs. Multiple Servings
Scaling your thermos coffee recipe is easy once you know your target volume. For one serving, I use 20 grams of coffee for 320 milliliters of water. For more people, just multiply both the coffee and water amounts to keep the strength the same.
Using a digital scale is the best way to avoid wasting coffee or making it too watery. Measuring by weight ensures every batch tastes just right, no matter the thermos size.
| Serving Size | Coffee (Grams) | Water (Milliliters) | Strength Profile |
|---|---|---|---|
| Single (12 oz) | 22g | 350ml | Balanced |
| Double (24 oz) | 44g | 700ml | Balanced |
| Large (32 oz) | 60g | 960ml | Bold |
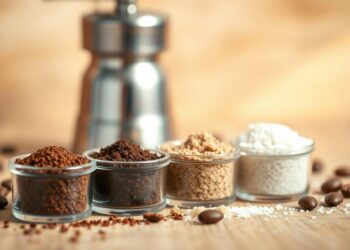
The Importance of Grind Size
Your choice of grind size is key to a great thermos brew. The immersion method lets coffee grounds soak in water for a long time. The size of the particles affects how fast the flavor is pulled from the bean.
Learning these brewing coffee in a thermos techniques can make your daily coffee better. The right grind keeps your coffee smooth, not harsh or too bitter.
Why Coarse Grinds Work Best for Immersion
For immersion brewing, a coarse grind is usually the best. It’s like sea salt or rough breadcrumbs. This grind allows for a slow, steady extraction that brings out the coffee’s natural sweetness.
If your grind is too fine, the water extracts too much too fast. This results in a muddy, silty texture that can spoil your drink. A coarse grind keeps sediment at the bottom, giving a cleaner finish.
Adjusting Grind for Different Coffee Roasts
While coarse is standard, adjust your grind based on the roast. Darker roasts are more porous and extract easily. Keep these coarser to avoid bitter notes.
Lighter roasts are denser and harder to extract. You might need a slightly finer setting to bring out their bright, fruity notes. By trying different grinds, you can make each batch just right for you.
How to Brew Coffee in a Thermos
Brewing coffee in a thermos is a unique way to get a rich, full-bodied cup. It uses the immersion method, where grounds steep in hot water. This method brings out deep flavors that drip machines often miss. It’s great for those who want quality without the hassle.
Preparing Your Thermos and Coffee Grounds
Start by making sure your thermos is clean. Any old coffee or tea can mess up the taste of your new brew. A quick rinse with hot water is a good way to clean it.
Then, measure your coffee beans carefully. Grind them to a coarse consistency, like sea salt. This helps avoid bitterness from the long steeping time.
Executing the Immersion Brewing Process
With your grounds ready, it’s time to brew. Add the grounds to the bottom of your clean, warm thermos. Pour hot water over them until the thermos is full.
“The secret to a perfect cup of coffee is not just the beans, but the patience you bring to the brewing process.”
Stir the mixture well with a long spoon for about thirty seconds. This makes sure all grounds are saturated for even extraction. Close the lid and let it steep for four to five minutes.
Filtering and Serving Your Brew
Once steeped, you need to separate the grounds from the coffee. Pouring it through a fine-mesh sieve or a coffee filter is best. This step makes sure your coffee is smooth and free of sediment.
If you’re in a hurry, use a French press-style plunger if your thermos has one. Pour the coffee into your favorite mug and enjoy the satisfying warmth of your freshly brewed coffee. You’ve now learned how to brew coffee on the go.
Mastering Brewing Time and Temperature
Learning how to control heat and time can change your coffee game. It’s all about mastering these two key elements. This way, you can make sure your coffee is always top-notch.
The Ideal Water Temperature for Extraction
Water temperature is crucial for bringing out coffee flavors. If it’s too cold, your coffee will lack depth. On the other hand, boiling water can make it taste bitter.
For the best flavor, aim for a water temperature between 195°F and 205°F. This range ensures a balanced extraction that showcases your coffee’s unique flavors. Precision is key, so using a digital thermometer is a good idea.
Finding the Sweet Spot for Steeping Time
After getting the temperature right, focus on the steeping time. This time affects how much flavor is extracted from the coffee grounds. A good range is four to six minutes for most methods.
If you like a stronger coffee, try the six-minute mark. For a lighter taste, go for four minutes. Experimenting within this range will help you find your perfect cup.
| Roast Level | Water Temperature | Steeping Time |
|---|---|---|
| Light Roast | 200°F – 205°F | 5 – 6 Minutes |
| Medium Roast | 198°F – 202°F | 4 – 5 Minutes |
| Dark Roast | 195°F – 198°F | 3 – 4 Minutes |
Common Mistakes to Avoid
Learning to avoid simple mistakes is key to a perfect thermos brew. Even with top-notch gear, it’s easy to fall into common traps. These can ruin your morning coffee. Knowing these pitfalls helps you keep quality high in every batch.
Preventing Over-Extraction and Bitterness
One big mistake is leaving coffee grounds in the thermos too long. This makes the coffee harsh and bitter. You need to watch the steeping time to keep the flavor balanced.
If your coffee tastes astringent, try brewing for less time. Patience is a virtue, but knowing when to stop is crucial. Always remove the grounds or pour the coffee into a separate carafe once it’s done.
Avoiding Temperature Loss During Brewing
Keeping the coffee hot is vital for a great experience. A common error is not sealing the lid tightly while brewing. If heat escapes, your coffee will be uneven and lukewarm.
I always check the seal before leaving my thermos. Keeping the lid closed keeps the heat in. This ensures your coffee stays hot and tasty for hours.
Pro Tips for Better Thermos Coffee
My quest for the ultimate thermos coffee led me to some key discoveries. Making small tweaks to your routine can greatly improve your coffee. These tips for brewing coffee in a thermos will help you enhance your coffee experience every time.
Pre-heating Your Vessel for Longevity
One top tip for brewing coffee in a thermos is to pre-heat it. Just fill your thermos with boiling water and wait a few minutes before brewing. This step keeps the cold walls from cooling your coffee too fast.
Warming the inside of your thermos keeps your coffee at the optimal drinking temperature longer. It’s a quick step that makes a big difference. Your coffee will stay hot and flavorful, not just warm and weak.
Enhancing Flavor Profiles with Bean Selection
The quality of your beans is crucial for great coffee. Try single-origin coffees to find unique flavors that stand out even in a thermos. Whether you like bright African beans or rich South American roasts, your choice is key.
“Coffee is a language in itself, and the right bean tells a story that lingers long after the last drop is gone.”
Here’s a quick guide to help pick the right bean for your next thermos coffee:
| Roast Type | Flavor Profile | Best For |
|---|---|---|
| Light Roast | Floral and Acidic | Pour-over methods |
| Medium Roast | Balanced and Nutty | Daily thermos use |
| Dark Roast | Bold and Smoky | Long-lasting heat |
By following these tips for brewing coffee in a thermos, you turn a simple habit into a special ritual. Remember, the best coffee is the one that you love. Keep trying different beans and methods to find your favorite.
Troubleshooting Your Thermos Brew
With a few tweaks, you can turn a simple cup into a work of art. Even with the best methods, results can vary. Using thermos coffee brewing hacks helps fix these problems fast.
Fixing Weak or Sour Coffee
Thin or sour coffee often means the extraction wasn’t complete. This is because the water didn’t pull enough flavor from the beans. To fix this, try adjusting your grind size to be slightly finer. This increases the surface area for better extraction.
Another solution is to steep your coffee for a bit longer. Adding two or three more minutes can balance out the acidity. These thermos coffee brewing hacks ensure your coffee is always great.
Managing Sediment and Cleanup
Dealing with coffee grounds at the bottom of your thermos can be annoying. To reduce sediment, use a high-quality paper filter or a fine-mesh metal strainer when pouring. If you prefer the immersion method without a filter, let the grounds settle for a moment before pouring.
Cleaning your thermos right after use stops oils from building up and affecting future brews. A quick rinse with warm water and mild soap works well. Keeping your equipment clean ensures fresh flavors every morning.
| Issue | Primary Cause | Recommended Fix |
|---|---|---|
| Sour Taste | Under-extraction | Use a finer grind |
| Bitter Taste | Over-extraction | Reduce steeping time |
| Excess Sediment | Coarse grounds | Use a finer filter |
| Lukewarm Coffee | Heat loss | Pre-heat the thermos |
Elevating Your Daily Coffee Ritual
Learning to brew coffee on the go can transform your mornings. This thermos coffee making tutorial is your guide to a great cup anywhere.
I hope you’re excited to try these methods with your favorite coffee beans. Even small tweaks can make a big difference in taste and texture.
See your coffee equipment as a tool for creativity. Every cup is a chance to improve your taste and find new flavors in your coffee.
Don’t be shy to share your coffee creations with others. Your unique take on this tutorial might inspire others to improve their coffee-making skills.
Enjoy the journey of making the perfect coffee. I’m excited to hear about the tasty brews you’ll make on your adventures.


